
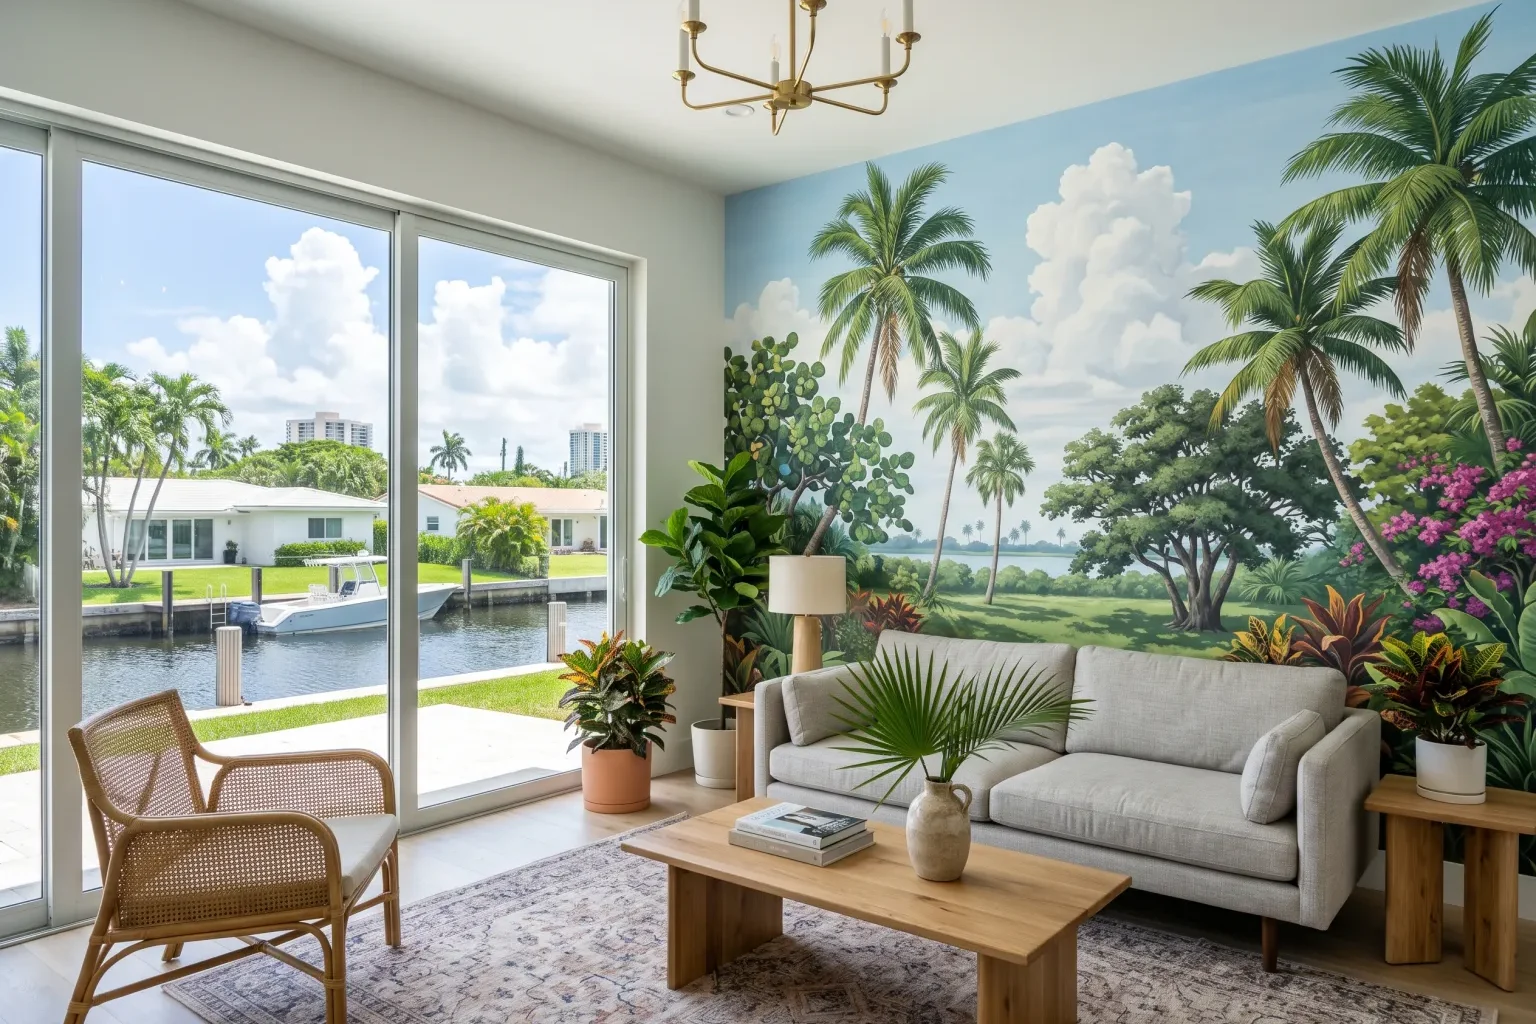
The short answer
A mural is right when one wall deserves to be the focal point and has few doors, windows or outlets breaking up the image. We level and prime the surface, dry-lay every numbered panel to confirm the image lines up, then hang from a plumb line so the picture stays straight from floor to ceiling.
A wall mural is one large image split across a set of numbered panels. Unlike repeating wallpaper, there is only one correct place for every inch of it: a tree branch, a horizon line or a city skyline has to continue across each seam exactly as the artist drew it. That makes mural work a puzzle that is solved on paper first and on the wall second. True Wallpaper Installation hangs printed murals for homeowners in Fort Lauderdale and nearby Broward County communities, from a single nursery wall to a tall great-room feature. Below you will find guidance on choosing the right wall, how the surface is prepared, the order we hang panels in, the things that shape a quote, and simple habits that keep the image crisp in a humid coastal climate.
Picking the Wall That Deserves a Mural
The best mural walls are wide and uninterrupted. A bedroom headboard wall, the long side of a dining room, the wall behind a sofa or a child's play area all give an image room to breathe. Every light switch, vent and window cuts a hole in the picture, so a wall with three openings will lose a lot of the design. Before you order, stand back and imagine which parts of the image will sit behind furniture or a television; a sunset hidden by a headboard is wasted.
Scale is the other decision. Murals are usually sold to a specific width and height, and most suppliers let you add a bleed allowance around the edges. In homes with vaulted or sloped ceilings, which show up in many Broward townhomes and newer single-family houses, we help you decide whether the image should be cropped at a horizontal line or run all the way into the peak. Murals printed on vinyl-coated or nonwoven stock handle a bit of moisture better and suit kids' rooms and family spaces; paper-based prints look softer but need a drier room.
Surface Preparation for a Single Large Image
A mural magnifies flaws because the eye follows the image across the wall. A bump in the drywall can bend a straight horizon, and a dip can make a seam gap open up. We sight down the wall with raking light, fill holes, flatten old anchors, sand ridges and skim coat sections that have heavy orange-peel or knockdown texture. Old paint that peels when tape is pulled off is scraped and spot-sealed.
Moisture gets a quick check too. Exterior walls in concrete-block homes can stay damp after a stretch of summer storms, and adhesive will not cure properly over a cold, wet surface. Once the wall is sound, it receives a dedicated wallcovering primer. Primer gives every panel the same grip, allows small adjustments while the paste is wet, and protects the drywall face if the mural is removed later. For lighter images we choose a white primer so the background does not dull the printed colors.
Our Mural Hanging Sequence
Murals arrive with a panel map showing the order of each strip. We follow it closely, but we also verify everything on site because print widths and wall measurements rarely agree to the fraction of an inch.
Most panels are hung with a butt seam, edge to edge, with no overlap. Some murals are designed with a small overlap for double-cutting, where we slice through both layers at once with a straightedge to create a perfect joint, then remove the scrap underneath. Either way, we roll each seam lightly and clean paste from the face immediately so it does not dry with a shine.
Trimming is done last, after the paste has grabbed but before it is fully cured. Excess at the ceiling, baseboard and corners is cut with a sharp blade against a broad knife. Around outlets we turn the power off, remove cover plates, cut an X over the box, and trim neatly so the plates sit flat when reinstalled.
- Measure the wall at several heights and widths, since few walls are perfectly square.
- Lay all panels out on a clean floor or table in order to confirm the image flows and nothing was misprinted.
- Decide where the image's horizontal features, such as a horizon or a row of windows in a skyline, should sit relative to furniture and eye level.
- Snap a plumb line for the first panel; this line, not the corner of the room, keeps the picture square.
- Apply paste to the wall or the panel as the material requires, then hang panel one and smooth it from the center outward.
- Line up each following panel by matching the image at eye level first, then work up and down.
Factors That Shape a Mural Quote
Mural labor depends far more on the wall and the material than on the number of panels. Here is what we look at during the walkthrough.
- Condition of the surface: a smooth, painted wall goes quickly, while heavy texture or damage needs skim coating and drying time.
- Print material: paper, nonwoven and vinyl-coated murals each paste and handle differently, and peel-and-stick versions need a very clean, slick surface.
- Image alignment: a detailed photograph with fine lines needs slower matching than a soft watercolor wash with forgiving edges.
- Size and height: walls taller than standard need ladders or scaffolding, and very wide murals may involve more panels and seams.
- Openings and corners: wrapping an image around a corner or cutting it around windows and built-ins adds careful handwork.
Keeping a Mural Looking Sharp
Give the adhesive a few days to cure before pushing furniture back against the wall or hanging artwork on top. After that, care depends on the print surface. Vinyl-coated and many nonwoven murals tolerate a soft damp sponge with plain water; paper prints should only be dusted. Test any cleaning on a low corner first. Keep tape, sticky hooks and putty off the image, since they can lift the ink layer when removed.
Sun and humidity are the two long-term factors in Fort Lauderdale. Direct afternoon light can fade printed inks over time, so blinds or UV film on large windows help. Running the AC steadily through the humid season keeps seams tight. If a seam lifts after a long power outage, a small amount of seam adhesive pressed in with a roller usually fixes it. Save leftover trim pieces; they make color matching easier for any future touch-ups.
Mural Installation by city
- Mural Installation in Wilton ManorsLocal service & repairs
- Mural Installation in Oakland ParkLocal service & repairs
- Mural Installation in Lauderdale-by-the-SeaLocal service & repairs
- Mural Installation in Lauderdale LakesLocal service & repairs
- Mural Installation in LauderhillLocal service & repairs
- Mural Installation in Dania BeachLocal service & repairs
- Mural Installation in Pompano BeachLocal service & repairs
- Mural Installation in North LauderdaleLocal service & repairs
- Mural Installation in PlantationLocal service & repairs
- Mural Installation in SunriseLocal service & repairs
- Mural Installation in HollywoodLocal service & repairs
- Mural Installation in TamaracLocal service & repairs